
Professional Showcase Installation for Custom Display Cases
Professional showcase installation turns factory-manufactured display cases into accurately positioned, fully operational fixtures within the finished retail or exhibition environment.
Custom showcases combine glass, metal structures, cabinetry, doors, drawers, locks, lighting and electrical components. After transportation, these elements may require on-site assembly, precise leveling, alignment, connection and functional adjustment before the display case is ready for use.
SUNZEN connects showcase installation with showcase engineering, showcase manufacturing and project delivery, creating a coordinated path from technical development and factory production to the completed installation.
What Is Included in Showcase Installation?
Showcase Positioning
Locate each display case according to approved floor plans, architectural reference points, circulation requirements and surrounding fixtures.
On-Site Assembly
Reconnect cabinet modules, glass structures, trims, shelves and other components that were separated for transportation.
Leveling & Alignment
Adjust the showcase to maintain stability, consistent heights, clean joints and accurate relationships between glass and cabinetry.
Glass Installation
Install separately packed glass panels, shelves, doors and display components while protecting finished surfaces.
Lighting Connection
Connect and test integrated LED systems where the required site power and electrical provisions are available.
Final Adjustment
Test doors, drawers, locks, hardware and lighting before the completed showcase is handed over for merchandising.
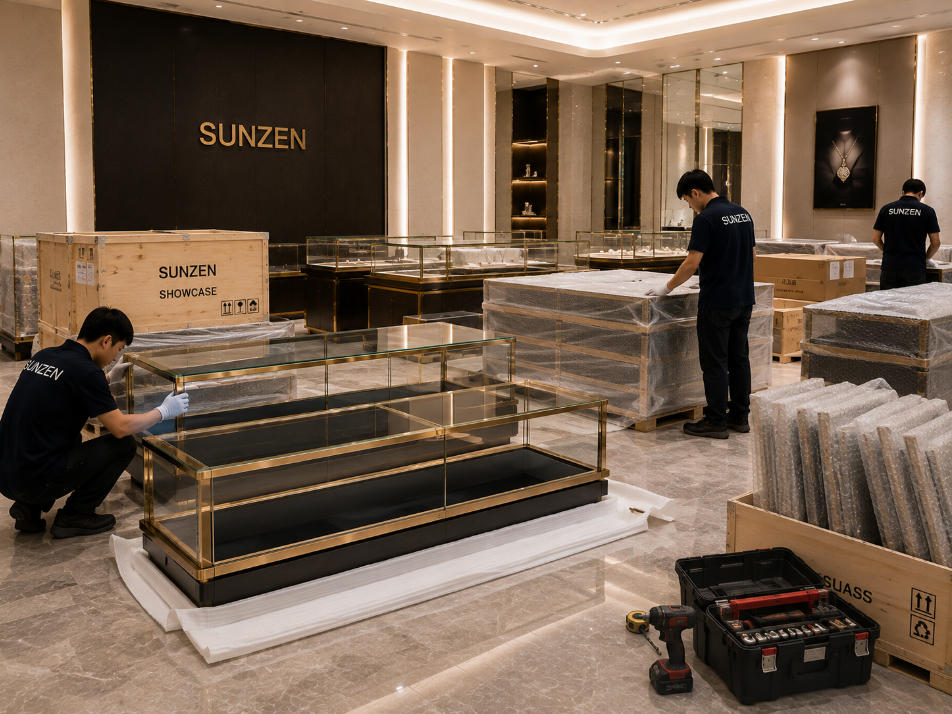
Prepare the Site and Showcases Before Installation Begins
Professional display case installation starts with checking whether both the fixtures and the project site are ready for installation.
Fixture Identification: Confirm each showcase and separately packed component against the approved fixture schedule.
Installation Area: Review the intended showcase position and surrounding architectural conditions.
Floor & Wall Conditions: Check the surfaces that influence leveling, positioning or fixing.
Power Provisions: Confirm required electrical connection points for illuminated showcases.
Surface Protection: Protect completed floors, walls and finished showcase components during installation.
Position the Showcase According to the Approved Layout
Even a fully assembled display case needs accurate positioning. Its location influences circulation, viewing angles, customer access, staff operation and relationships with adjacent fixtures.
Floor Position
Transfer dimensions from the approved layout to establish the intended physical location of the showcase.
Clearance
Maintain required spacing around doors, drawers, staff access areas and customer circulation routes.
Visual Alignment
Align showcase edges, centerlines and heights with nearby fixtures and architectural elements.
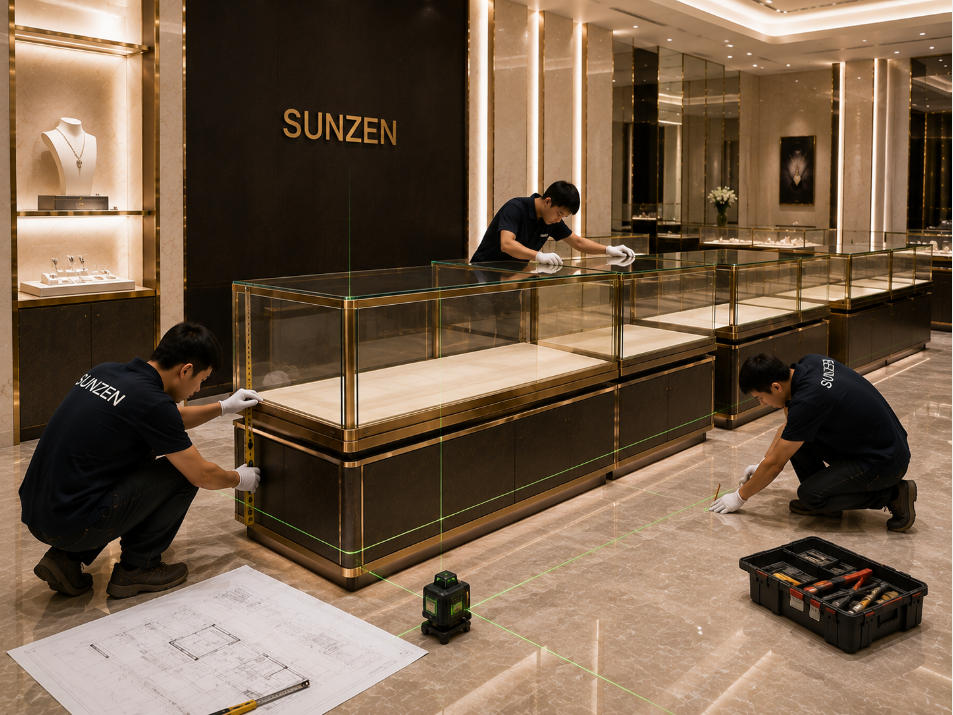
Translate Technical Dimensions into the Final Showcase Position
Installation converts dimensions defined during design and engineering into physical positions inside the finished space.
Laser levels, measuring tools and approved drawings can be used to check showcase centerlines, distances, heights and relationships with surrounding fixtures.
Accurate positioning is particularly important when several showcases need to form one coordinated island, counter line or display zone.
Install Glass Components with Controlled Alignment
Glass is one of the most visually sensitive components of a showcase and may be packed separately when transportation or fixture construction requires it.
Glass Panels
Position glazing accurately relative to the supporting metal or cabinet structure.
Glass Doors
Install sliding or hinged glass doors while maintaining the required operating clearances and alignment.
Glass Shelves
Install shelves and supports at the intended display heights and confirm stability before merchandising.
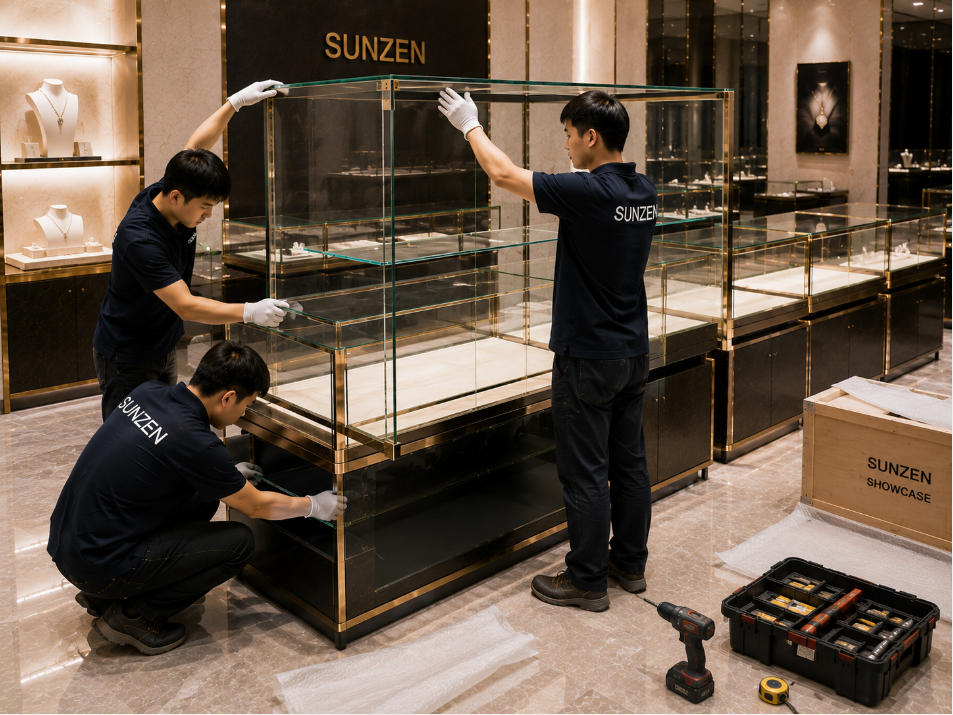
Coordinate Glass with the Supporting Showcase Structure
Glass dimensions, support points and surrounding clearances are defined before manufacturing, but their final relationship becomes visible during physical installation.
Panels should sit correctly relative to metal frames, cabinet bodies and adjoining glass surfaces without disrupting the clean appearance of the showcase.
This is why installation requirements should already be considered during display case engineering rather than being treated only as an on-site issue.
Reconnect Modular Showcase Sections On Site
Large counters, islands and architectural showcases may be divided into multiple transportable sections before shipment.
Cabinet Modules
Connect neighboring cabinet sections while maintaining consistent heights, joints and front alignment.
Display Structures
Install upper glass structures, display platforms and other separately transported components.
Finishing Components
Complete trims, end panels, kick plates and other finishing elements after the main showcase structure is aligned.
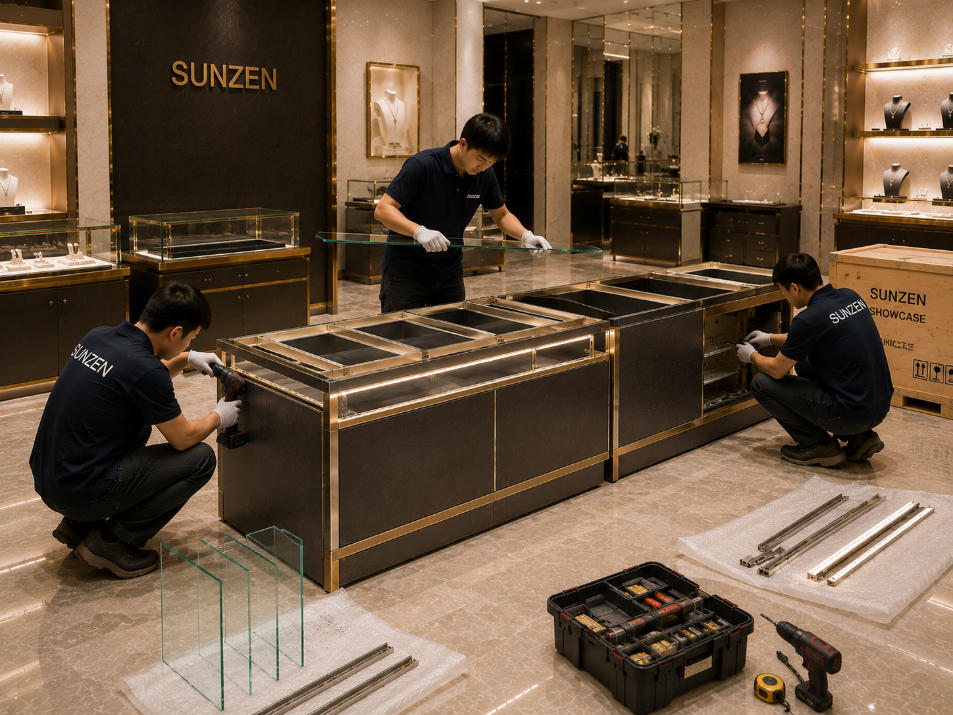
Rebuild Transportable Modules into the Complete Showcase
A showcase may leave the showcase factory fully tested but partially disassembled to reduce transportation risk and improve site access.
Installation teams reconnect the relevant sections according to the fixture construction and approved assembly sequence.
The completed installation should reproduce the intended geometry, visual alignment and operating performance established during factory assembly.
Fine-Tune the Showcase After It Reaches Its Final Position
Base Leveling
Compensate for minor floor variation so the showcase remains stable and visually level.
Glass Alignment
Check visible glass lines, joints and relationships with surrounding frame components.
Cabinet Alignment
Adjust doors, drawers and cabinet faces after the fixture is leveled in its final position.
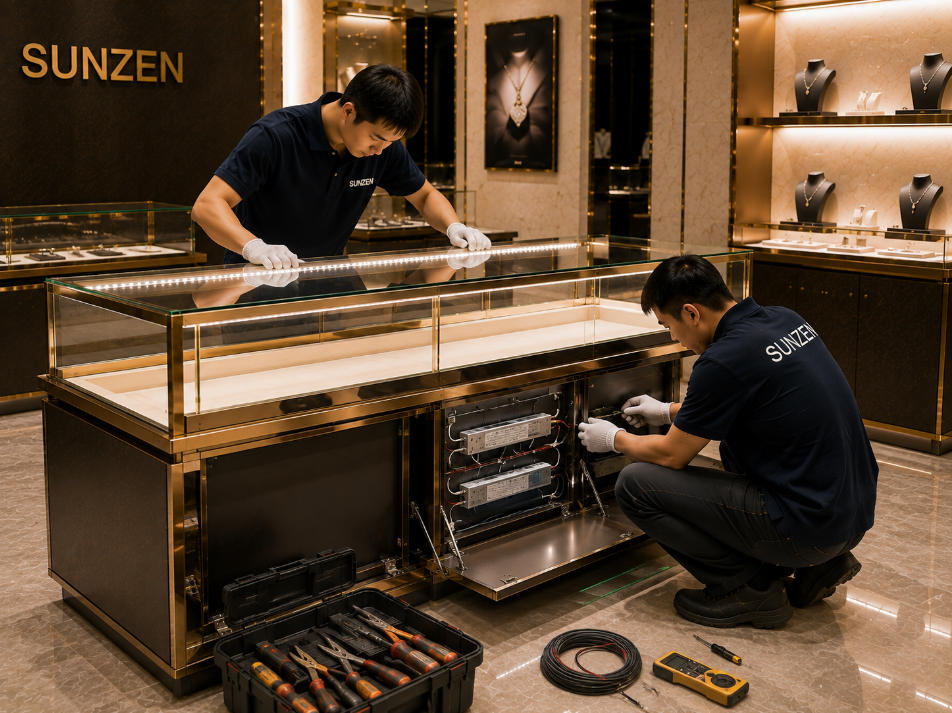
Connect and Test Integrated Showcase Lighting
Premium showcases frequently include integrated LED illumination with concealed wiring, drivers and service access.
After the display case reaches its final position, the lighting system can be connected to the prepared project power provision and tested under installed conditions.
Installation should maintain access to electrical service components while keeping technical equipment concealed from normal customer view.
Adjust Doors, Drawers, Locks and Access Hardware
Transportation and final leveling can slightly affect the relationship between moving components, making final adjustment an important part of showcase installation.
Sliding Doors
Check sliding movement, track alignment, stops and closing positions.
Hinged Doors
Adjust hinges and gaps to support controlled opening and consistent visible alignment.
Drawers
Test slides, extension, closing action and alignment with adjacent cabinet fronts.
Locks
Confirm that showcase locks engage and release correctly after final alignment.
Shelves
Check shelf positions and support components before products are placed inside the display case.
Lighting
Verify illumination across the display area after all structural and functional adjustments are complete.
From Delivered Display Case to Finished Installation
Site Check
Confirm installation areas, access routes, floor conditions and required site provisions.
Unpacking
Identify showcases and separately packed components while maintaining surface protection.
Positioning
Place each display case according to approved drawings and architectural reference points.
Assembly
Reconnect modular cabinets, glass, trims, shelves and other site-installed components.
Adjustment
Level the showcase and adjust glass, doors, drawers, locks, hardware and lighting.
Inspection
Review the finished display case before merchandising and project handover.
Different Display Cases Require Different Installation Methods
Counter Showcases
Require accurate leveling, glass alignment, staff-side access and adjustment of drawers, doors and locks.
Island Showcases
Need precise floor positioning and consistent alignment when several display cases form one central arrangement.
Wall Showcases
Require coordination with wall surfaces, niches, fixing conditions, electrical provisions and surrounding finishes.
Tall Showcases
Need careful vertical alignment, stability and controlled positioning within the intended floor location.
Glass Vitrines
Place greater emphasis on glazing, glass joints, display platforms and visually clean structural connections.
Custom Showcases
Project-specific designs may require unique installation sequences developed around their construction and site conditions.
Inspect the Completed Showcase Before Handover
Final inspection confirms that the installed display case performs correctly in its actual project environment.
Position: Confirm location and spacing against the approved layout.
Level: Check stability, horizontal lines and vertical alignment.
Glass: Review positioning, joints and visible condition.
Hardware: Test doors, drawers, hinges, slides and locks.
Lighting: Confirm integrated illumination operates correctly.
Finish: Review the complete showcase for visible installation issues before merchandising.

Plan Showcase Installation Before the Fixture Leaves the Factory
Pre-Assemble & Test
The showcase can be assembled during manufacturing to verify construction, glass, hardware and lighting before shipment.
Protect & Transport
Packing strategy can consider fragile glass, removable components, installation sequence and project-site access.
Position & Complete
The delivered showcase is positioned, assembled, leveled, connected and adjusted for final use.

From Manufactured Display Case to Finished Presentation
Installation is the final technical stage that connects showcase manufacturing with the actual customer-facing display environment.
Once correctly positioned, leveled, illuminated and adjusted, the showcase can move from a manufactured product into a functional part of the retail or exhibition space.
Explore our completed projects to see custom display cases within finished commercial environments.
Showcase Installation vs. Store Fixture Installation
Focused on Display Cases
Covers the positioning, glass installation, assembly, leveling, lighting connection, hardware adjustment and final inspection of custom showcases and display cases.
Focused on the Complete Fixture Package
Extends installation coordination across wall fixtures, counters, islands, display systems and other custom retail fixtures throughout the store.
Showcase Installation FAQs
What is showcase installation?
Showcase installation is the on-site process of positioning, assembling, leveling, connecting and adjusting custom display cases after delivery to the project location.
What is included in display case installation?
Display case installation can include site preparation, positioning, modular assembly, glass installation, leveling, lighting connection, door and drawer adjustment, lock testing and final inspection.
Can glass showcase components be installed on site?
Yes. Glass panels, doors, shelves and other glazing components may be packed separately for transportation and installed at the project site according to the showcase construction.
Can large showcases be assembled on site?
Yes. Large counters, islands and custom showcases may be divided into transportable modules and reassembled after delivery.
Why does a showcase need leveling after delivery?
Site floors can have minor variations, and transportation can affect component relationships. Final leveling helps maintain stability, alignment and correct operation of doors and drawers.
Is showcase lighting connected during installation?
Integrated LED lighting can be connected and tested during installation when the required project electrical provisions and site conditions are available.
What is checked after a showcase is installed?
Final inspection can review showcase position, leveling, glass alignment, doors, drawers, locks, hardware, lighting and visible finishes before merchandising.
What is the difference between showcase installation and store fixture installation?
Showcase installation focuses specifically on custom display cases and glass showcases, while store fixture installation covers a broader package of retail fixtures such as counters, wall systems, islands and other store furniture.
Need Showcase Installation Support?
Share your display case drawings, fixture schedule, project location and installation requirements with SUNZEN. Our team can coordinate manufacturing, packing, delivery and installation-stage requirements for custom showcase projects.